


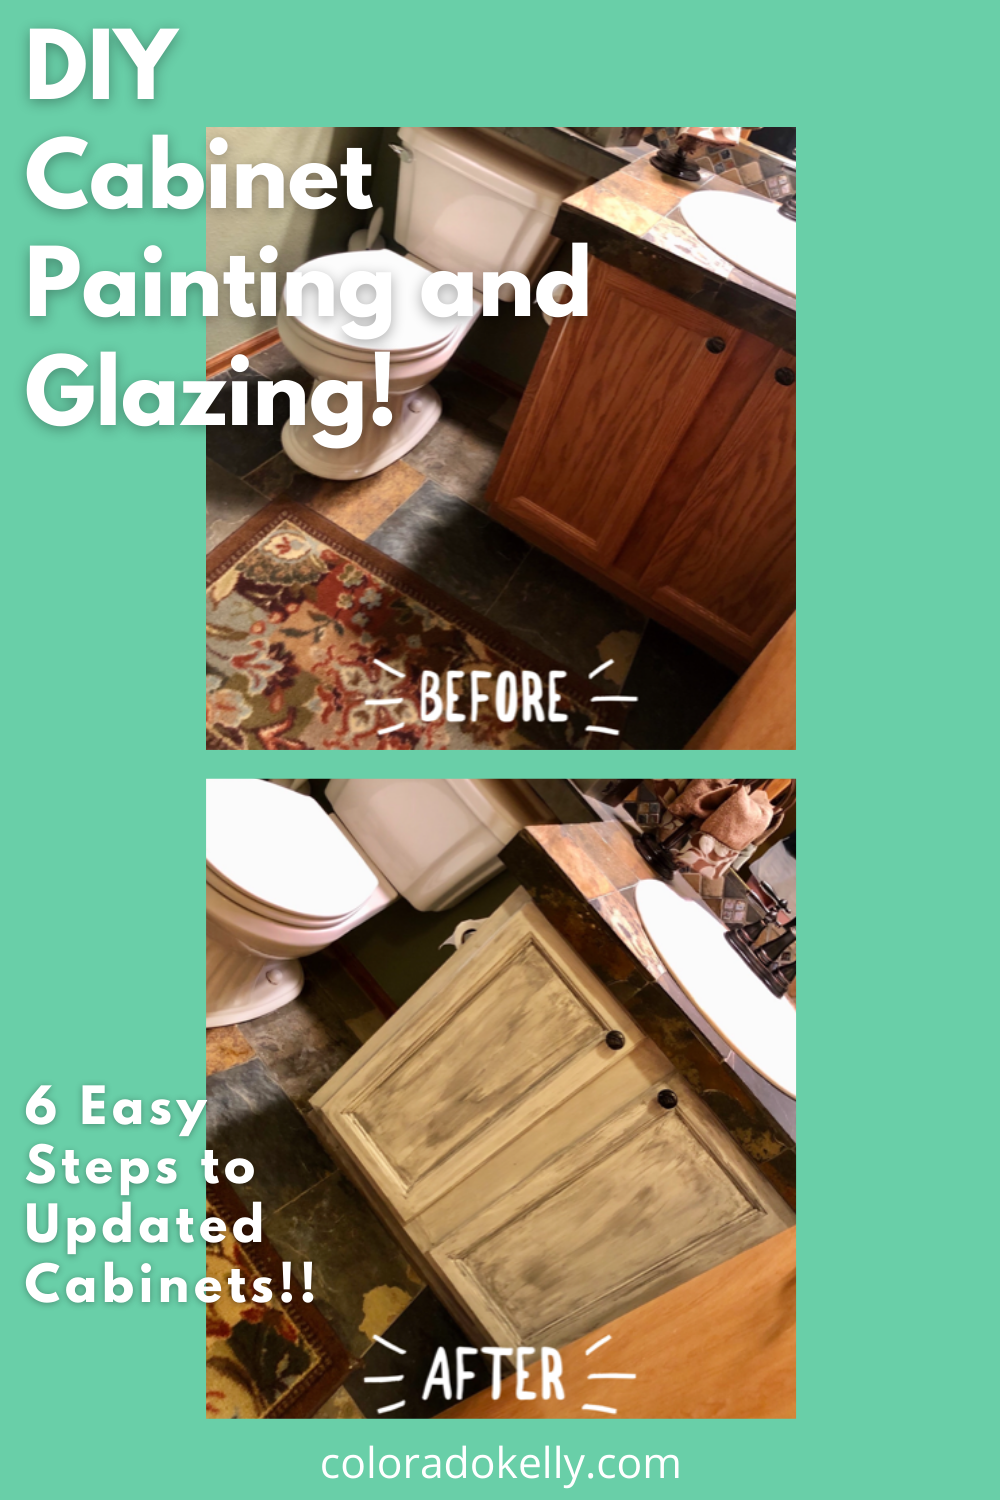
DIY Cabinet Painting and Glazing
Truth be told, we have A LOT of honey oak cabinets in our home. And I am tired of looking at them! Especially after re-doing the floors in all the bathrooms and kitchen within the past year! But alas, I am very thrifty when it comes to certain things and decided I would try to do it myself! So I have done my home work and decided to DIY Cabinet Painting and Glazing!
What Does Glazing Mean?
The definition of glazing is to have a semi-clear coat over a paint color. It adds dimension and texture. The overall look is elegant! Plus, it is easy to do it yourself!
Affordability
My main concern when I decided I needed to change the look of my cabinets was to do something that was affordable. Therefore, I started researching how to DIY Cabinet Painting and Glazing.
For less than $75 I purchased all I needed to do not only my half bath cabinet, which are pictured in this post. But I will also have enough to do my guest bath too! But for now, I am working on the half bath. I wanted to start somewhere small, so if I didn’t like the results, it would not be that hard to re-do! Got to always think ahead!
Supplies
Here are the supplies I used to paint and glaze my cabinets. I used an enamel paint. If you use an oil based paint, especially for white, it will yellow over time. If you like that antiqued look, great! If not, stick with water based acrylic or latex paint. The paint I used claimed to dry in one hour. It didn’t dry in exactly an hour, but I did have two coats done on this small cabinet in under two hours.
- 1 quart of paint in the color of your choice. I used Wise Owl One Hour Enamel in Antique Villa
- 2 Foam Brushes
- 1-2 painter tarps. I could have cut one tarp in half my area was so small!
- Painters Tape. I used Frog Brand of painters tape!
- Clean White Rags that are LINT FREE
After doing some research I decided to go with foam brushes. Several other DIY people who have much more experience than myself, all suggested the foam brushes to get an even coat of paint. As a first timer, it went very well and I have to say, I liked the results!
6 Easy Steps
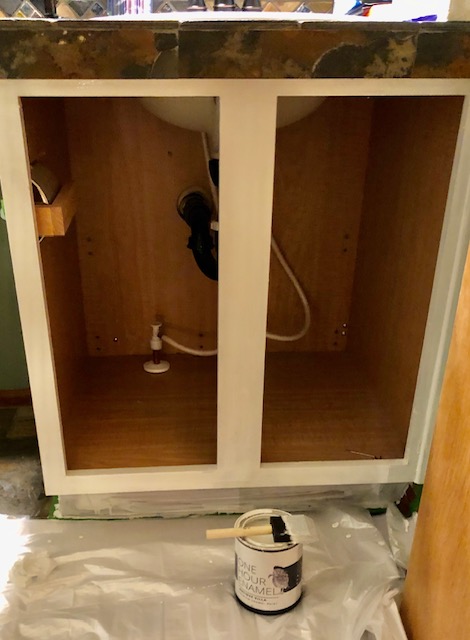
Step One: Remove everything from your cabinets. And make sure they are grime/dirt free.
Step Two: Remove the cabinet doors and their hardware. Sand any rough edges. I did not do any sanding prior to painting. But I did not have rough edges or dirty cabinets. I started with the half bath as my “tester” cabinet!
Step Three: Use painters tape to protect areas and items such as molding that you do not want to get excess paint on.
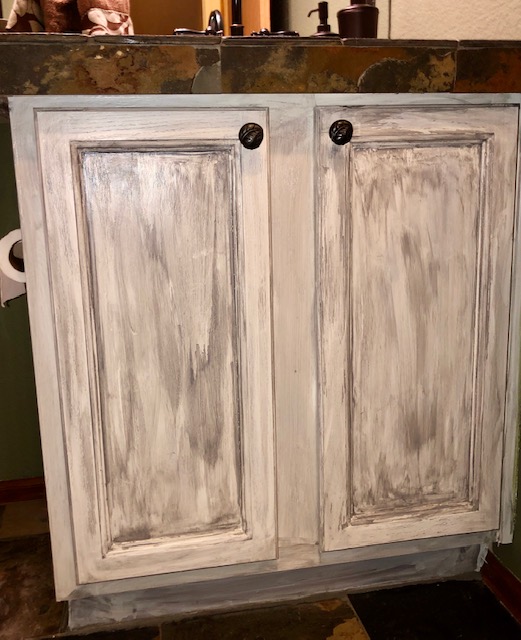
Step Four: Start painting! Paint one coat and let dry, then paint the second coat. Let the doors and cabinets sit over night before glazing. You want to make sure your cabinets are completely dry before glazing.
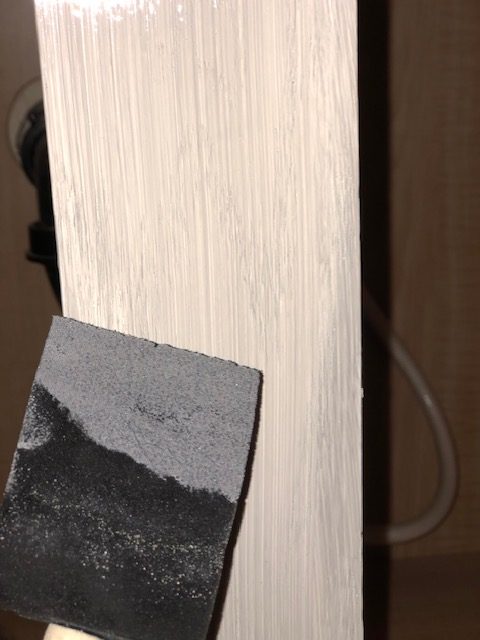
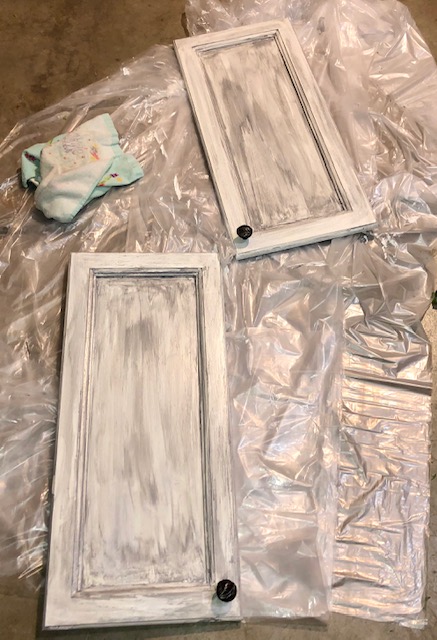
Step Five: Use your foam brush or a paint brush to paint glaze on your cabinets. Do each item individually and wipe glaze off quickly with lint free cloth after applying. You don’t want it to dry too much before wiping off the glaze as it will be too dark. Glaze will get into the crevices and create a “weathered” look. Let dry for at least 24 hours!
Step 6: Re-assemble your cabinets and enjoy! Some advised doing a latex top coat to preserve the glaze. I did not do that, but may if I find it wears quickly. So you will need to use your own judgement and what works best for you!
Tips
Here are a couple tips from my experience. Remember, this was my first time. And I love the look of the cabinets, however, here are some tips that will be useful for my next adventure in cabinet painting!
- Use long strokes. Do not make short, choppy strokes when painting and especially when glazing.
- Rather than use a cloth, wet your foam brush before glazing and keep damp during the process. I wish I had done this on the doors and not just the cabinet. It would have been so much easier as the glaze was just about perfect with the damp brush. I had little to no “wiping” off when I did it this way.
- I went with a slightly darker glaze on the doors, but if I was to do it again, I would do less glaze. Sometimes less really is better!
- Huggie baby wipes were a suggestion I had read somewhere while researching how to do the glazing. Apparently, Huggie baby wipes are perfect for wiping away the glaze!
- Last, glazing is truly a technique that takes a little time to master. But for a first timer, I think it went very well! And I should have done this project much sooner than I did!
Conclusion
I have to admit, this was so easy I should have done it much sooner than I did! And I cannot wait until my daughter moves into her condo so I can help her do some DIY Cabinet Painting and Glazing projects too! I hope you enjoyed and this helps you in taking the plunge and doing some easy renovations in your own home! Gel Staining my master bath cabinets is next on my DIY journey!

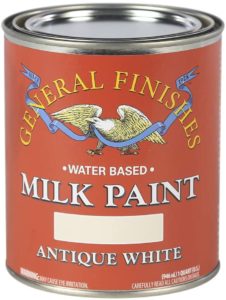
Here is an excellent paint choice if you are looking for something close to my choice! CLICK HERE to purchase from AMAZON!
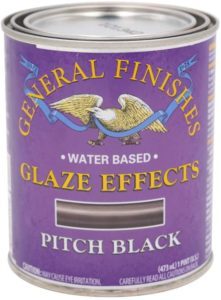
Here is a water based glaze in black. I used a color called driftwood that was a “lighter” shade of black. CLICK HERE to purchase a pint from AMAZON!
*This post may contain affiliate links! That means; I may get a commission at no additional cost to you! I do not recommend any products/services that I don’t use and love myself!


 7 Health Trends for 2020
Laura
I have a lot of cabinet painting to do, so this post was just up my alley! I’ve heard milk paint is easy to work with and works very well with oak cabinets! Great tips!
Kelly
I have heard that too, or chalk paint! I didn’t use those as it was suggested more than once to do a clear “top coat” so it just seemed to be more work!
Stephanie
It’s really neat what you can do to elevate a space with just a simple DIY or two! I’m glad you were able to give your bathroom cabinets the makeover you wanted, and that the process was relatively simple. Thanks for sharing your tips!
Kelly
It was super easy and I love how it turned out!
Tiffany Lei
This is so amazing and helpful! Thank you for linking to the materials you need to complete this project. I love doing arts and crafts so I will definitely try it out!
Becca @ The London Lifestyle
Great tips! I’ve just bought a bar cart which is unfinished, unpainted wood so I’d love to paint it x
Kelly
I hope it turns out beautifully!!!
Amanda Jackson
I have veneer cabinets that need to be painted…. any suggestions on what type of paint I should use?
Kelly
You can use just about any kind of chalk paint. But with that you will need to use a clear coat to keep them nicer, longer. I used a one hour enamel paint and then the glaze only. But it is a half bath that does not see a lot of traffic!
Becky
Wow, that looks so good! I’ve never attempted anything like that and we have some cabinets that could really use some love.
Kelly
Our cabinets needed lots of love! And I will not be attempting the kitchen cabinets (paying to have them done) I certainly wanted to try the smaller cabinets in the bathrooms!
Patricia @ Grab a Plate
DIY projects that others do always impress me! I get so nervous! Maybe it’s time to bite the bullet?? Lovely!
Kelly
Bite the bullet!!!! =)
Kait | Slumber & Scones
That’s such a dramatic change, and it looks like it was super easy to do! I haven’t thought about painting the cabinets in our home at all, but if I did I think I would also start with a small bathroom.
Kelly
It was much easier than I anticipated!!
Gina Abernathy
Thanks for the inspiration. Your cabinets look great. Good simple instructions.
Kelly
Thank you!!!!
ปั้มไลค์
Like!! I blog quite often and I genuinely thank you for your information. The article has truly peaked my interest.
Kelly
Thanks so much! I am thrilled you love it! =)