
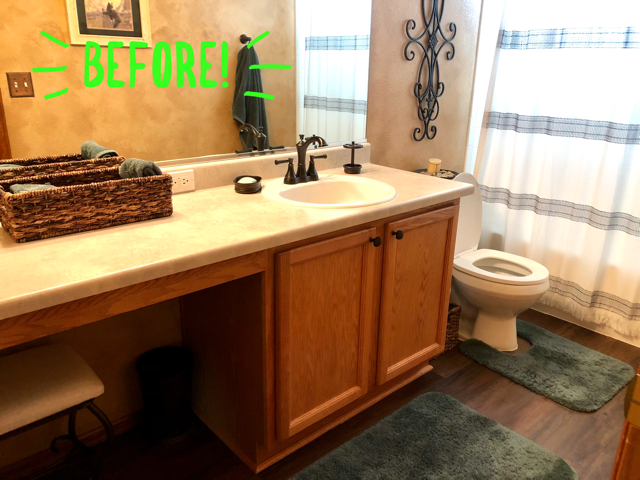
DIY Gel Stain Cabinets
My husband and I have been in our home for 15 years. And I have hated the honey oak finish since the day we moved in! But alas, it has taken us becoming empty nesters to finally start redecorating and updating the house. So this past year has been busy! We replaced the carpet and kitchen floor. I hired someone to paint and glaze the kitchen cabinets, that was a bigger job than I wanted to do! And I did some quick floor replacements in the spare bathroom and master! But I am excited to show you how I did with DIY Gel Stain Cabinets! This was by far the easiest home improvement DIY I have done!
Items to Have on Hand
- Plastic gloves (I used them so I didn’t get gel stain on my hands)
- 120 Grit sandpaper block
- Cleaning Cloth
- Gel Stain, in the color of your choice
- Plastic tarp
- Foam Paint Brush, mine had a width of 3″.
- Painter’s Tape (tape off any areas that you do not want gel on. Such as along walls and floors)
Getting Your Cabinets Ready
I wiped down my cabinets with a non-toxic cleaner. Just to get any dirt or dust off them. Then I took off the cabinet knobs and removed the doors from the cabinets. I then laid out my plastic tarp on the floor and taped off the walls and toilet dispenser.
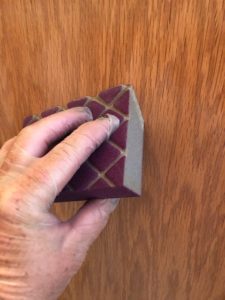
Then I used a 120 Grit sandpaper block and lightly sanded the cabinet doors and entire cabinet. I also lightly sanded the trim. Once I was done with the sanding I lightly wiped down the cabinets and doors with a wet cloth again. After they dried, which was only a couple minutes, I was ready to start staining! The sanding process only took about 30 minutes. My cabinet is small, but it didn’t take nearly as long as I thought it would!
Using Stain Gel
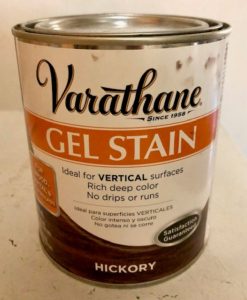
I used Varanthane Gel Stain in Hickory. I wanted a darker stain to match the new floor I installed several months ago. You can see how I did my DIY Bathroom Makeover HERE!
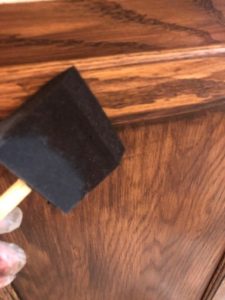
Luckily, when I tested the color on the inside of the door, I knew I would only need one coat! So I took my foam brush and started! I went around the edges and got the stain in all the nooks and crannies first! Then I started on the flat areas. I made sure my paint strokes went with the grain of the wood. If you need more than one coat, it is suggested you wait 2 hours in between each coat of stain.
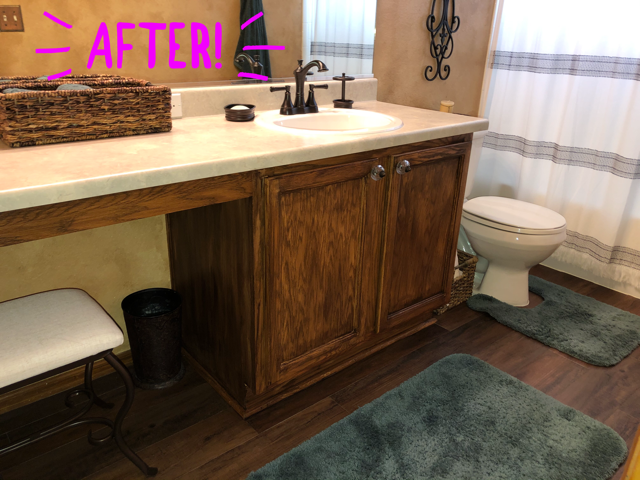
Conclusion
I spent less than $200 to give my spare bathroom a whole new look! Flooring included! If you notice I also changed out the knobs on the cabinet doors, so they would “pop” off the wood! This project took me less than 2 hours to complete and then 24 hours to dry. So if you are looking for a cabinet “update” this DIY Gel Stain Cabinets home improvement is for you!
Products I used!
I loved the brand of gel stain I used, they have a huge variety of colors to choose from too! Purchase from Amazon today!
I used a little heavier duty plastic glove. And they worked great, no tears and they were easy to work with on. Purchase from Amazon today!
More importantly, thank you for spending your time here at Colorado Kelly! I love having you here and appreciate everyone that comes to visit and look forward to having you come back soon!


 DIY Chunky Knit Blanket
Jessica
I love the new look! The cabinets really bring the bathroom together to make it look cozier.
Kelly
Thank you! I love how they turned out!!!
Vanessa A King
We just bought a home that was built in the 50’s and we have lots of projects to tackle around here. I haven’t heard of Gel Stain! I will definitely look into it once we get around to remodeling our kitchen 🙂
Kelly
It was quick and easy!!
Rosey
I did the same in my kitchen years ago. It took a long time because there were so many, but it turned out really nice. When we moved, the buyer upgraded a few things before reselling, but he left those cabinets as is… It was minimally priced, fairly easy to do, and totally worth it since the change, like your bathroom, as instant and perfect!
Kelly
Thank you so much!!!
Cristina
Home crafts and DIYs are so intimidating to me!
It looks stunning, great textures and goes really well with the marble top!
Kelly
Thank you!!!
Kelly
Your before & after pictures look great!!
Kelly
Thanks!!
Emily Fata
Nothing like an awesome DIY project to try out! I’ll definitely see about giving this a go over the next few months. 🙂
Kelly
I have lots of things I want to get done this winter!
Jiawun
Omg it looks so gorgeous after! I love how well it goes together with the top. Beautiful!
Kelly
Thank you so much!
Christa
I love a great DIY! The before and afters are fantastic; I can’t believe how inexpensive the transformation was.
Kelly
It was very inexpensive and easy too!
Kileen
What a beautiful difference! I absolutely love the new color and how it turned out.
Kelly
Thank you!!
S
You did a beautiful job!
Kelly
Thank you so much!
Genesis
Wow, that gel stain makes an amazing difference! I love that you changed the handles, too, just to add a little more glam. What a great weekend project!
Kelly
Thnak you! I love how it turned out!!
Linda
I love a DIY project! The cabinets turned out great! Can’t wait to see what other fun things you get done this winter!
Kelly
I am so excited for my next DIY, just need to find the right wall rock to work with!