
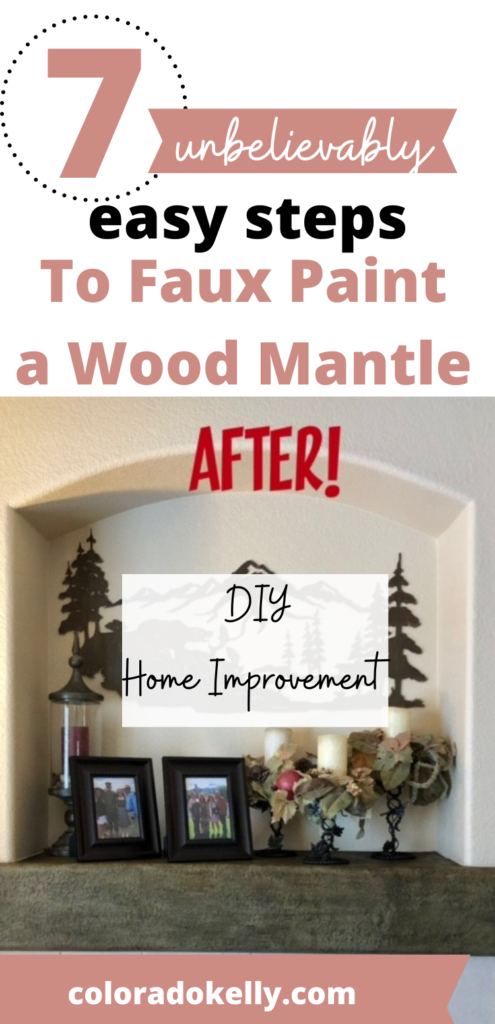
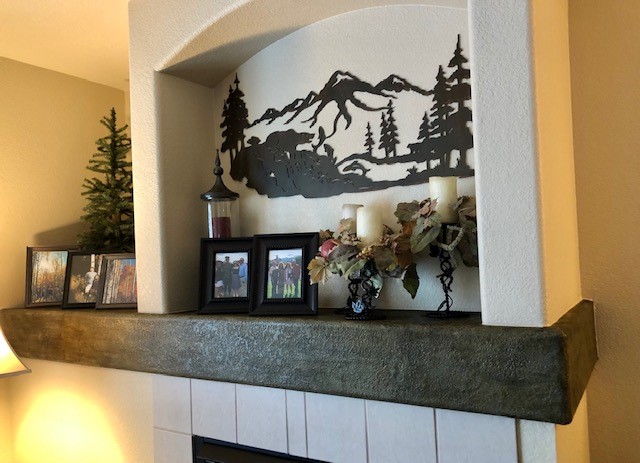
Faux Painting DIY, Make Your Mantle Look Like Wood!
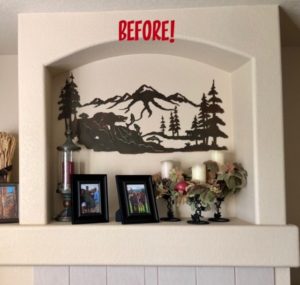
I have been having a lot of fun updating our house for the past year. And this project was no different! Our fireplace was boring. And I love the look of a real wood mantel, but alas, that was not going to work with how our family room is set up. So I did some digging and found out how to paint my mantel to make it LOOK like WOOD! It turned out amazing! I will share step by step everything I did in this Faux Painting DIY Project!
Timeline
This project took me 3 days only because I had to allow for drying time! Otherwise it was an hour here and there of actual “work”.
What you need!
- Plastic Tarp
- Blue Painters Tape
- Soft Natural Bristle Paint Brush
- 4″ Foam Paint Brush
- Round Chalk and Wax Brush
- Lint Free Clothes
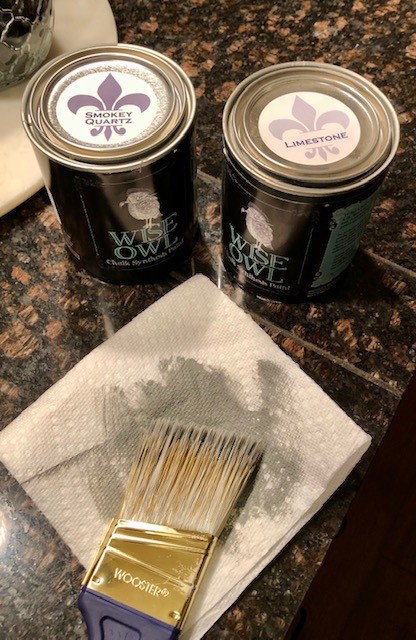
- 3 Different Shades of Chalk Paint
- light, medium and dark gray paint.
- Dark Chalk Paint Wax.
Step 1
The first step was to dust/clean the entire area. So everything on my mantle was removed, dusted and then I took a damp lint free cloth and wiped it over the entire mantle. Not wanting any lint or dust particles in my paint I took extra time to clean up before I started!
Step 2
Use painters tape to tape off all the areas you want to protect! That was probably the one of the most time consuming parts!
Step 3
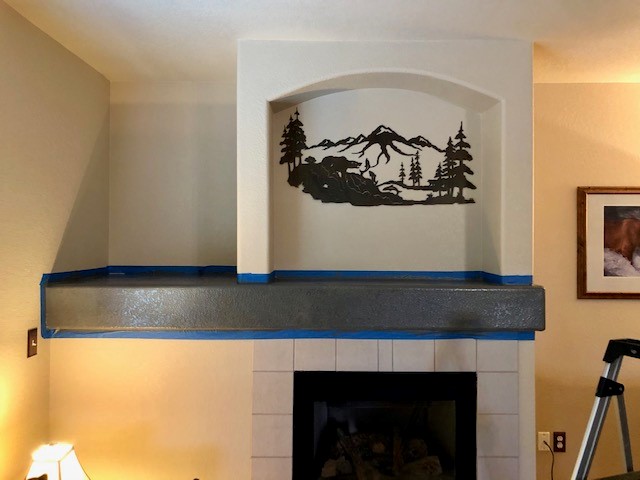
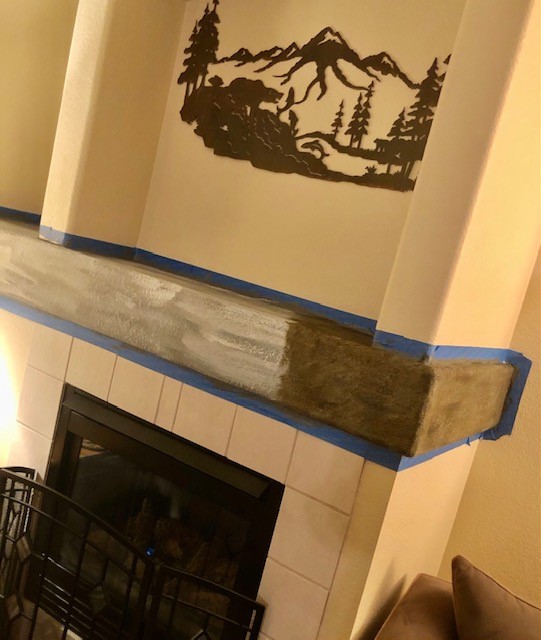
Paint the entire area with the DARKEST shade of gray. As you can see, it was a solid color by time I finished. I used the foam brush for this step. One coat, and let it dry overnight.
Step 4 and 5
I “dry brushed” the next two colors of gray. Dry brushing is a very easy faux painting technique. You dip you brush into the paint and take off the excess, I brushed the paint onto a paper towel before I ever painted the mantle itself. Then gently use long strokes as though you are painting in the same direction as wood grain. The painted will not and is not supposed to completely cover the base color. I dry brushed the lightest of the paints first. Let it dry for a couple hours, then dry brushed the medium color.
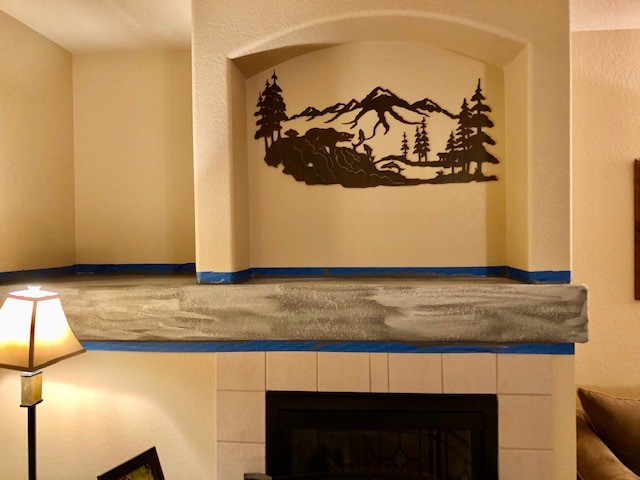
Notice how I painted in long lines? Paint in the same direction as if there was wood there and you are following the wood grain. Allow the paint to dry for at least several hours before applying the chalk paint wax.
Step 6
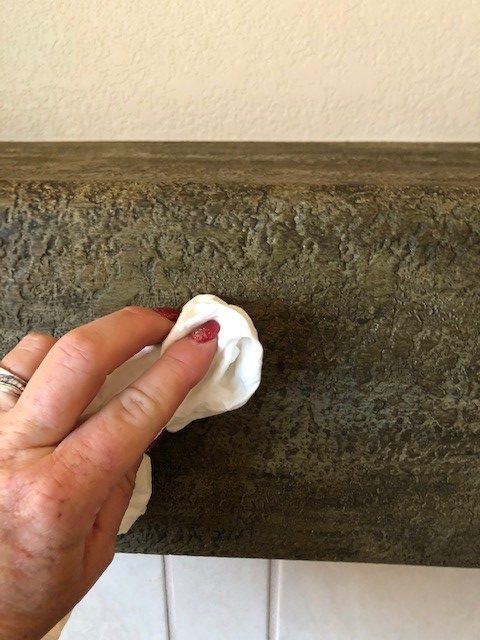
Time to wax! I did two coats of wax to get the look I wanted. And as my drywall mantle is textured, it gave it more of a distressed look, which I love! I used the round chalk and wax brush to apply the wax. This was a time consuming step. But I wanted to make sure I got every nook and crannie since the surface was textured. Once I had my first coat on, I gentle rubbed and buffed the wax into the drywall with a clean, lint free cloth. Then, I let it dry overnight. I followed the same steps the next morning for the second coat of wax. I let it dry for 24 hours after the final coat.
Final Step!
Gently buff the wax with a new, clean lint free cloth. This brings out more of a matte finish. You don’t need to apply much pressure, just be gentle and the matte finish will look beautiful!!
Conclusion
This was another super easy DIY. I should have done this much sooner as it makes my fireplace mantle “pop”! Other than taking time to dry in between coats, it did not take more than 3-4 hours of total work time. I hope you enjoy this Faux Painting DIY project as much as I enjoyed perfecting it!
Be on the look out for my project in January, Air Soft Rock make over! No more tile around the fireplace! I will be transforming this area even more with Air Soft Decorative Wall Rock! And I can’t wait! Here is another easy DIY!

Products!
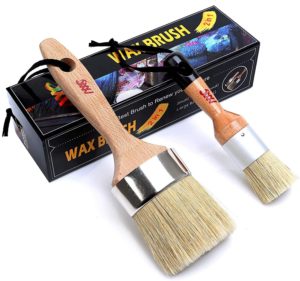
These round chalk paint brushes are an excellent purchase on AMAZON!
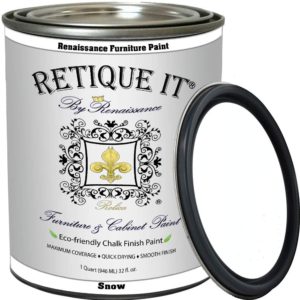
The three colors I would use with Retique It Paint is Greystone for your base. Use Snow and Dove for the dry painting. Purchase HERE from Amazon!
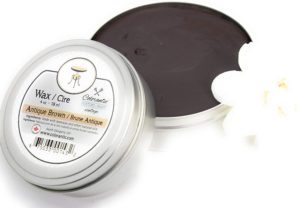
A dark brown wax is the final step! Colorantic has a great Chalk Paint Wax in the perfect brown! Purchase HERE from Amazon!
More importantly, thank you for spending your time here at Colorado Kelly! I love having you here and appreciate everyone that comes to visit and look forward to having you come back soon!
*This post may contain affiliate links! That means, I may get a commission at no additional cost to you! I do not recommend any products/services that I don’t use and love myself!


 Monat Sleep Drops Review
Angela
Wow superb DIY tips about painting.Thanks for sharing
Kelly
Thank you! I tried to be as detailed as possible!!!
Kelly
Thank you so much!
Jody
This turned out beautiful!
Kelly
Thank you!!!
Knashz
This looks great! I’d honestly love to put up something like this on my wall.
Kelly
It was easy!
Ambuj Saxena
I have a feeling that you have let out a secret! I used to think that there is nothing like a Faux painting! Haha but never mind.. i shall follow your updates in the future.
Kelly
Than kyou! I am glad you enjoyed it!
Kathy Ngo
I love that. I think I can actually do this with my own walls.
Kelly
Yes you can!!!!
Gladys Nava
Thanks for sharing your idea! I would love to try this!♥
Kelly
It is quick and easy!!!
Heidi
Such a fun DIY! I think anybody who is into DIY would enjoy this!
Kelly
Share if you know of someone please!!! =)
Alyssa Hixenbaugh
I love all of the details and information you put into explaining your DIY. Thanks for sharing!
Kelly
Thank you so much! I had fun working on this project!
Bella
Wow this is such a great DIY!! turned out so good. totally saving this.
Kelly
I’m glad you like it!!
Linda
That looks incredible! You are very talented. I think I’d have to be right on top of it to see that it isn’t actually wood. The contrast it adds to your fireplace makes such a big impact and the results are beautiful!
Kelly
Not so much talented as this was just an easy DIY! I still appreciate the kudos!!
Stephanie
What a fun and creative transformation. You’re always finding the best ways to DIY your home and it totally inspires me!
Kelly
I am so glad you enjoyed it!!!